RRT 3 Tips and Strategies from the Heineken & Pacific Railroad
Analysis
My analysis for the time being has been done on things that have hindered my making gold in the campaigns I've played. The last thing I did quite a bit of testing on was the train speed. In several scenarios, the goals were to have a certain train speed.
Getting high average train speeds.
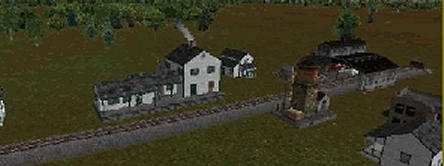
Besides the obvious factors of double track, running straight and level track and not overloading or congesting ones lines there is also station support building placement. I realized my trains weren't getting very good speed just going between two cities. The reason was that they were stopping midway for water, sand, and oil. Like the AI, I placed my support builds midway between two city stations. I built a test map to test various way of configuring support buildings.
Two cities were built exactly 200 spaces away. This translated to a different amount of miles but I'll get into that when I cover scales. I placed single track between these and built stations in each.
I ran tests with the Big 8-wheeler and the Consolidation. The Big 8-wheeler has above average acceleration and the Consolidation below average. I suppose for average acceleration you have to average the results. Test show that putting the service tower and maintenance tower midway between two stations is not the best setup. However, the Consolidation was more adversely than the 8-wheeler. Also, load totals were counted and were pretty much similar. One thing that was peculiar was that there were odd total loads hauled when all the trains ran exactly 4 cars each. This was because not all cars were 100% filled but I guess the game keeps track of decimal loads.
One thing was found was that when placing the service tower, the maintenance shed against each other or a station a 1 mph crawl was observed. This must be some sort of 'braking' anomaly. Whatever you do, do not butt any of these building up to one another.
I made a series of test with the service tower and maintenance sheds separated from one another with a distance of 1, 3, and 5 spaces (when you are about to place something they jump from position to position - I call that a space). Also, I reversed the order with the shed first then the tower than the other way.
The speediest turnaround configuration is also the hardest consist to set up. This has the support building off the mainline. No waiting in station-to-station travel. It may not be worth the effort unless one of the medal goals is high average train speed.
The Big 8-wheeler (above average) didn't seem to care which way they were. In all cases, it averaged 33 mph. In one year when the buildings were spaced at 3 spaces, it made a top speed of 36 mph (highest of any single year) but in the end, it didn't matter. When the tower and shed were placed midway between station the 8-wheeler made an average of 31 mph.
The Consolidation (below average) seemed to be more affected by the arrangement. When the buildings were placed midway between stations made an average of 23 mph but ran out of water sometimes. When the same test was done again but with an additional water tower, it only made 19 mph. For one space separation, the average speed was 27 mph, 103 loads. For 3 spaces, 27 mph and 106 loads. For 5 spaces, with the tower furthest from the station, the average speed was 26 mph and 100 loads. When the tower was closer to the station, at 5 spaces, the average was 26 mph and 105 loads. In conclusion, the slower trains need the service building closer but not less than one space.
If one really wants fast average speed the best configuration is to put the tower and the shed on a spur or off a dead end of track near a station. Have the cars unloaded at the station and run an empty engine through to the end service building then come back and pick up cars. When cars are on the train are the only times the speed is recorded. Use the station building buttons to find the appropriate stop by name. Trying to actually click on the service building on the spur from the map is quite difficult.
One thing to note is that when a service tower or maintenance shed is put on as part of the consist; this will force the engine to top off. This will let your train get as much distance between service towers as possible and not run dry half way between distant stations. But, it may induce extra delay if it is a short distance between stations. If you want to just fill at the 50% or less levels then make the destination a waypoint at the end of the spur.
Waypoints - Hold down the Ctrl key while mousing over your rail line on the small consist route map. This makes a tiny little square on the map and at the bottom of the page says something like "245,201 Add waypoint at 245, 201 to the train's route.".
Scales
In trying to set up a test bed for speeds and other things I came across the need to find the scale I was working in. I found that there are progressive levels of cell sizes used in the game. There are large economic cells. This is where the cargo loads are situated. You can view them when you lay track and turn grid on. Apparently, these are about 11 miles across. Within these are a 4 x 4 sub-cells. More for track laying and building placement. These are not the finest positions in the game. Buildings can be placed at about 10 different positions inside these, though the entire sub-cell is owned by the building. In editor a X-Y number shows on screen. This is an entire sub-cell.
One other distance quantity exists. This is the track section count. This is different than miles. It appears that a track section is either one third or one fourth of a mile. Track sections are used in the Central Pacific campaign scenario.
Note: the movement of cargo at 8 economic cells or 88 miles in a year computes to about 3 mph if you compare it to the 25mph (using the better support building setup) average speed of a train. A train would make 750 miles a year or 66 economic cells a year.

The large square is the economic cell. The smaller cells are the building placement cells. An economic cell appears to be 11 miles across.
Bigger is Better
When it comes to stations, the bigger the station is - the more passengers and mail wanting to go on your trains. I was attempting to test if station size made the train average speed slower as it seemed to go about 1 mph on the station track. But when I did a test with small stations versus large station I found that the large collected much more express (valuable cargo) than did the small. Since express cars are lighter, the speeds were less. On a 207 mile trip the Duke (Average in about everything) made 36 mph hauling between two small stations. When these were upgraded to large, the cargo shifted to all express cars showed up and the average speed was 39 mph over a 5-year period. On the opposite for cargo transportation, a small station is just as good as a small if placed directly next to your cargo source. All cargo value set at a station is the point the station is on. One thing a large station can do is collect cargo from various cells with different values and loads, it at the value at the stations point. This is especially good at reaching into a price well of cargo and pulling it out to be sold somewhere else.
Custom Consists
The use of custom consists are two fold.
1) Transporting select cargoes does not change their base price at the point of pickup. An auto consist will eventually raise the price of the cargo at the point of pickup. This has the ill effect of lowering your profit for hauling it since the difference between pickup price and delivery price is smaller.
2) Limiting cargo to only those you select on a custom consists prevents 'agents' from hauling away precious resources you may need for industries in the city. If you have a mill that needs cargo to manufacture some product, you do not want if hauled away to someplace paying more for it. (This is one reason not to let AI trains run on your lines.)
Hauling Practically Anywhere
You may think it is impossible to take cargo from an industry that is paying the same amount for a raw cargo as your own industry. It isn't. You just have to know how to do it.
Say for instance your steel mill needs iron and coal and another steel mill has a rich supply. Your mill is paying $66 a carload for iron and so is the other. How do you move that iron to your mill when there is no profit? The answer is stations. Like was mentioned the large station can reach over several economic price cells. Cargo price at a station is determined by the cell the center of the station is on, not the cell the cargo is on. Thus, you can pull cargo out of a price well if your reach is long enough.
What you want to do is place a large station as far away from the other steel mill as possible but still cover their stack of iron. Check around too to see if the price of iron is lower in some direction or another. A hill or some rough terrain lowers the price in that direction. Place a large station down. Check the price. It should be lower than $66 a carload. Now, lay track to your steel mill. Check around with the global cargo display to see where the price next to your mill is highest. Us a small station and try to get it as close to the mill and in the highest price cell as possible. If you've done your job well the pickup station will have vast quantities of iron for about $62 a carload while the delivery station will pay $64 for it. Ok! $2 is no great shakes, but you can now run your steel mill and make a profit and then use the steel in another industry and make a profit there.
Note: Use the custom consist for this to haul just iron to forestall a price change.