RRT 3 Tips and Strategies from the Heineken & Pacific Railroad
Surveyor
The number one thing to remember to do when map making is backup your map. I have a working copy. A test copy and a series of saved maps. I make new save map after a few hours of work. If for some reason I messed up a map but didn't realize it I can go back to some previous save and start my changes again.
With the mapmaker, it is fairly easy to make a good map blank. If you plan on using it for multi-player play, it probably should not be greater than 512 on a side. For single player the game engine might handle twice that size. My largest map so far is 832 x 512. Maps must have dimensions that are multiples of 64 plus 1. (I don't think that 1 pixel is ever used for anything.)
Scaling the Map
I use the grayscale map scaled locally tga files. The maps made from 32 bit (blue and red) seem to be a little too jagged for my taste. Depending on the area of interest, I make large continental areas at least 700-800+ bits wide. A smaller interest like a state should not be greater that 550. I turn off snap to 64 + 1 for the initial bitmap, as I will trim the map in Paint Shop once it is scaled to the right size. Snapping it to 64 at start seems a distortion to me. After making the initial bitmap I do take it into Paint Shop and resize it to the size recommended by the Map Maker. Then I resize it again but this time by the given ratio either making it larger or smaller. But, this time one of the dimensions should be a multiple of 64 + 1. Then I trim off the other dimension so it too is a multiple of 64+1. I save over the old tga file, as the editor doesn't like new tga files created by Paint Shop. In scaling hills and things, I use about a 0.75 height factor, but 1.0 smoothness.
River Placement
The single most tedious and difficult part of scenario map making is river placement. A good reference map is crucial in helping locate rivers on your map. It took me about 60 hours to place all the rivers in my Great Northern map.
Rivers usually follow the lowest elevation in an area. With the paint bucket tool, you can find the lowest elevations by hovering the bucket over the map. With the bucket set to 'Below' and the control key is held down you will highlight all the lower elevations. Moving the tool around you can see where the river most probably would flow. Caution that you don't actually pour the paint as you could ruin the map if you already painted it. This is one reason to have backup copies of the map.
 Hover the paint tool over the likely area for your river.
The 'Below' setting will allow you to locate the lower elevations, the usual place for the river.
 After sketching in the river switch back to the paint tool to see how close you came to placing the river.
Once you determined the low-lying river valley switch to the river tool. For now, turn off color changes and contour changes as you will want to at first sketch the river in so you may be off in you placement and you don't want to change the elevations until the exact placement is assured. By going back and fourth between tools, you can get a very good placement of the river. Also, be sure to double check the river shape with an actual map, as sometimes the river doesn't match the lowest elevations. This is because when making a map the elevation is determined by the average height of all the land within several miles. A narrow river valley may be averaged with a hill or plateau and not be the lowest cell in a group of cells. When you are sure you have nailed down the exact location of the river cells, turn the contour box on and click through the river again to hollow out the riverbed. The wider the river, the deeper the contour change.
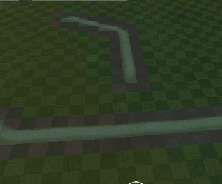

First, place the main channel. Then approach it perpendicular with a branch stream. Lay the branch right up against the main channel. In that, spot place a branch cell right on top of the stream object. The river will probably flow in the wrong way at that point. Use the river tool to herd it in the correct direction. Once you've mastered the 90° joining you can try sharper angles. Also, note that the river will flow away from the branch cell in the direction that the last two cells before the branch guide it.
River Junctions
To see how these work, first make a straight section of river. Then make a tributary river join it at 90°. Now paint the tributary river up to the cell next to the main stream. This will usually disrupt the flow and it may break the river and join the main stream. Next, use the branch tool and place it on the last cell of the tributary. Go back to your river tool and re-lay the main stream with the correct river size. Next, change the tool to size to that of the tributary and click on part of the tributary to make it flow as one. You may have to click on the branch cell to get it to flow in the correct direction. If a river is not flowing in the correct direction, just click on it to reverse its flow. More daring river branching can be done from different angles. But, these are more difficult to work with.
The Lake Tool
This is one of the best tools to contour land. It's also one of the most dangerous to work with. Be sure to back up a copy of your map right before using it.
Railroads often ran along river valleys. However, in our scale of one or more miles per cell the river valley would have to be pretty wide to accommodate a river and railroad. You will note that a river takes up 3 cells. One for the actual water and two cells one on each side of it. When you try to lay track even over a side cell you will get an 'invalid position over water' message. Thus at the minimum you will need 4 cells in a river valley to lay track and river. But, if the valley curves or the water meanders, this will need to be increased to 5 or 6 cells. Your natural river valley must be expanded to at least 4 cells. To do this, use the lake tool. Shift click until you find the lowest elevation at the mouth of the valley. Lake tool four cells around this and continue halfway up the river valley. Now go to the other end of the valley and shift click around until your lake setting is the lowest elevation in this general area. Once set then lake fill the valley down to meet lower lake cells. Change tools and use the land-making tool to change these back to land. At this point, you have two elevations in your valley with a large step midway up it. If this step is too high for your liking (I don't care for anything over 50 height factors), make a few smaller steps using the same lake method. You will probably have to hunt around the map sampling different elevations with the shift lake tool to find good intermediate heights. Back up your map at this point, as this is where I've had occasion to set odd spots to lake height by forgetting to shift click.
Once several steps have been made in the valley floor elevation further smoothing can be done in one of two ways. 1. You can use the steamroller tool to smooth out the steps. Or 2. A river can be laid down the valley with the contour box checked. The bigger the river the more the contour change. This doesn't have to be the actual river that will in the end go down the valley. This would just be using that tool to smooth.
Waterfalls
While making a four to 6 cell wide river valley is completely out of scale for 2 miles to the cell map, it looks perfectly nice from the train's point of view. For this reason, rivers running into the valley from the side can be made into waterfalls. Use the lake-making tool to set the elevation of the top of the falls and bottom. This makes a nice crisp falls edge. Make the bottom stream a wider river than the top, as this is to represent the pool at the bottom. Paint the cell white, and a nice touch would be to add a few steam particle objects at the bottom edge to be the mist.
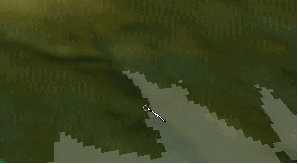
 Colombia River Gorge from Great Northern map is 6 cells wide,
but from the train level looks in scale.
Placing Cities and Resources
A good reference to where to place resources would be an early (1950s or earlier) encyclopedia. They show resources as pictures like that of the image below…
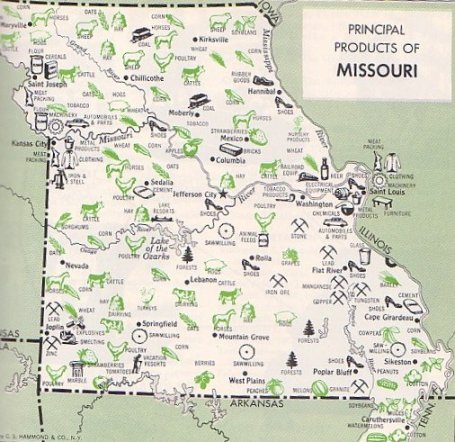
…which makes it easy to add farms, mines, and industry to the various cities and regions. I've tried trying to calculate using map size and ratios to latitude and longitude to find the city locations. But, as I had to trim some edges to fit the 64 x n +1 size requirements, I can't seem to get this accurate enough. The best way I've come up with so far is to cross-reference some physical components of the map, like a point of land on the sea, a mountain peak, or a bend in the river.
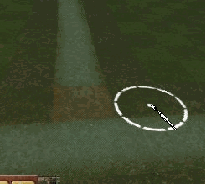
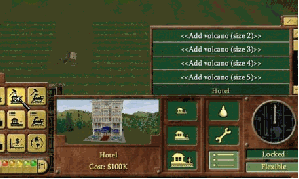 To place a city click the top center control button.
Then click the bottom right 'build stuff' button.
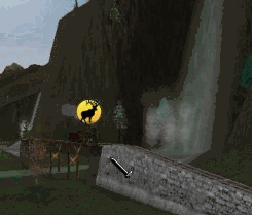
 You will not see the < Add a city > item on the list until you scroll up.
Warehouses and Ports
These can be set to supply or demand products. Also, they can be used as some sort of industry that takes a cargo and returns another one. Usually it will produce one unit of cargo for each one supplied. But, if you first change the supply number to a number other than '1', it will produce this amount of products from each one you deliver.